# Publishing a Unity WebGL game from scratch in under 30 minutes
# Premise
Unity has made game development more straightforward than ever before. One can create a game prototype in mere hours and have it on their device with a single click. Still, publishing web builds can be a challenge if you aren't familiar with the available web hosting options. Fortunately, nowadays, there are many ways to host your games and even automate the build process.
This tutorial is a quick guide to setting up Unity (opens new window), GitHub Pages (opens new window) and GitHub Actions (opens new window). You'll create a new Unity project and deploy it to a web page accessible from any device.
Who this tutorial is for: You should have a very basic understanding of git and GitHub and basic Unity knowledge.
Before you start, you will need to install:
- GitHub Desktop (opens new window)
- Unity Hub (opens new window)
- (via Unity Hub) Unity version of your choice with WebGL module installed
This tutorial uses Unity 2020.3.9f1, though it should work with any recent version.
In the end, you will have the following project structure:
├── .github
│   └── workflows
│       ├── activation.yml
│       └── deploy.yml
└── UnityWebGLDeploy
    ├── Assets
    ├── Packages
    ├── ProjectSettings
    ├── UserSettings
    └── .gitignore
You can use it as a reference for your progress over this tutorial. You can also download the full source code from Razenpok/unity-webgl-deploy (opens new window).
Screenshots in this tutorial are for reference only and might be outdated.
# Create and clone GitHub repository
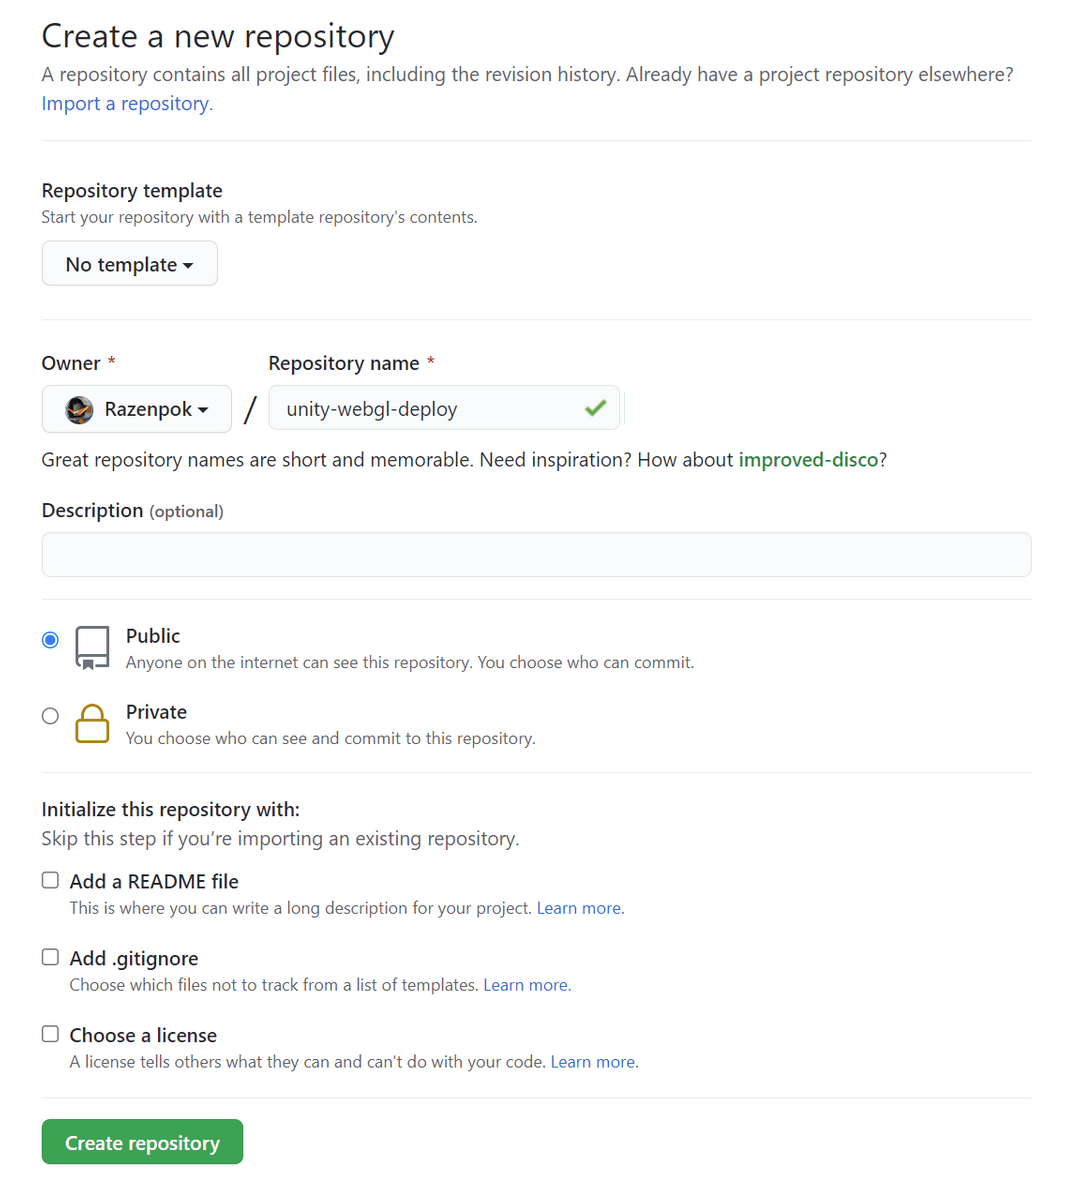
First, we need to create a new git repository. Head over to github.com/new (opens new window) and create one.
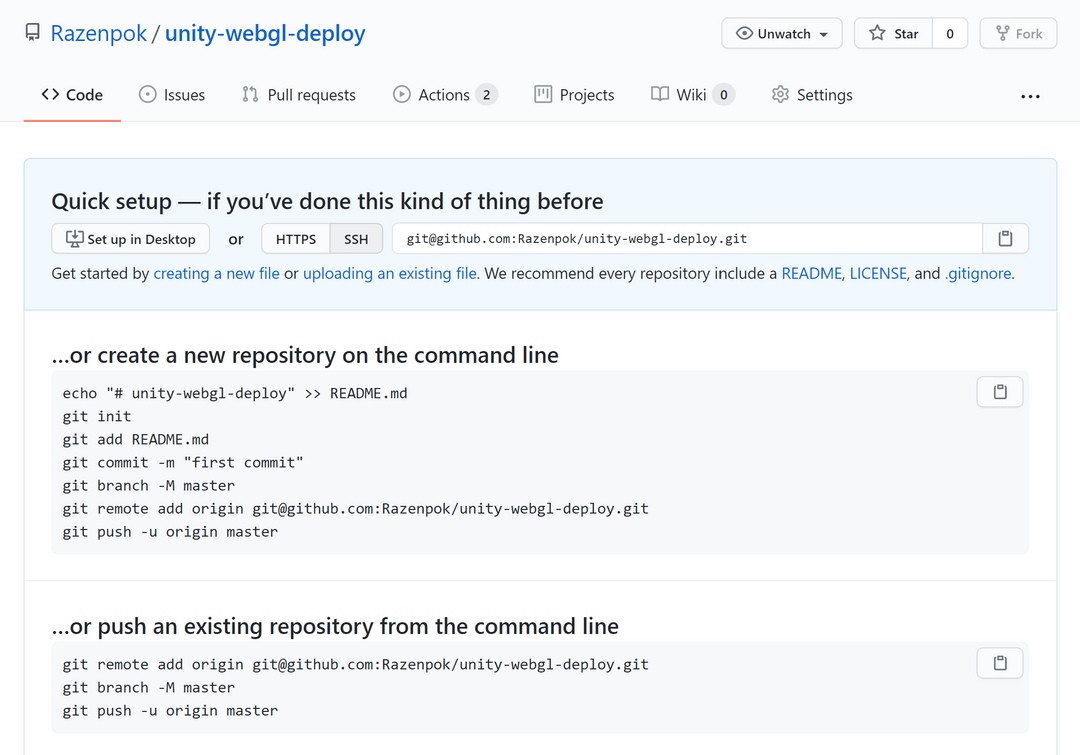
Next, press the Set up in Desktop button to clone this fresh new repository.
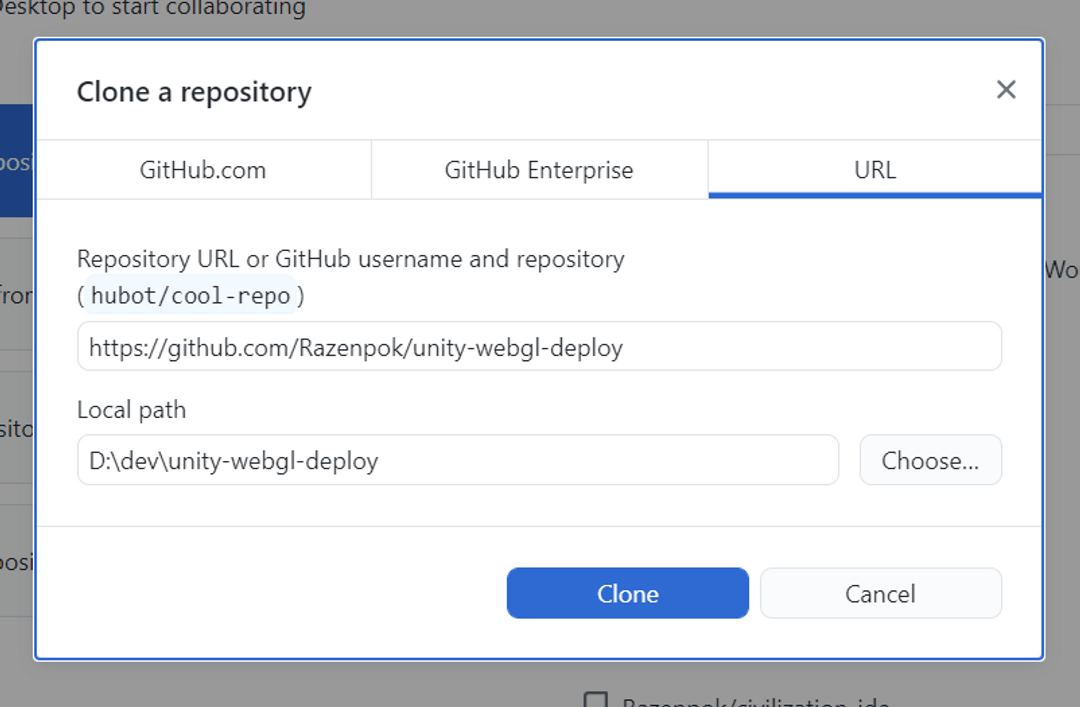
You should see a Clone a repository window in GitHub Desktop. Choose the
preferred path for the repository and hit Clone.
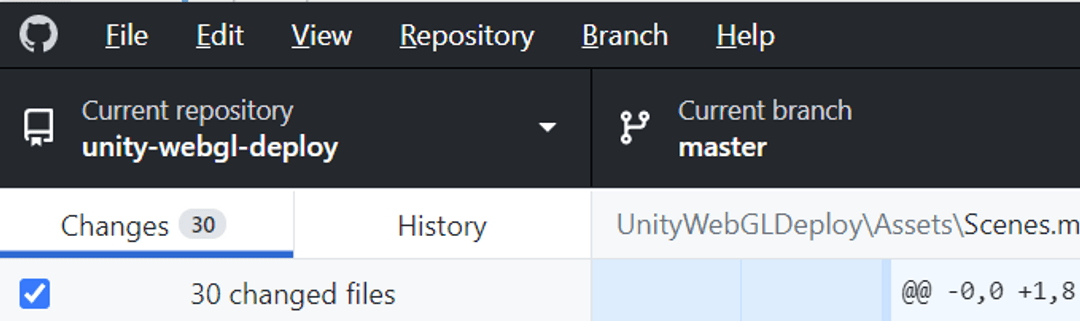
After you are done with cloning, note the default branch name: it should be
either master or main. Take note of which one you have - you will need it
later on.
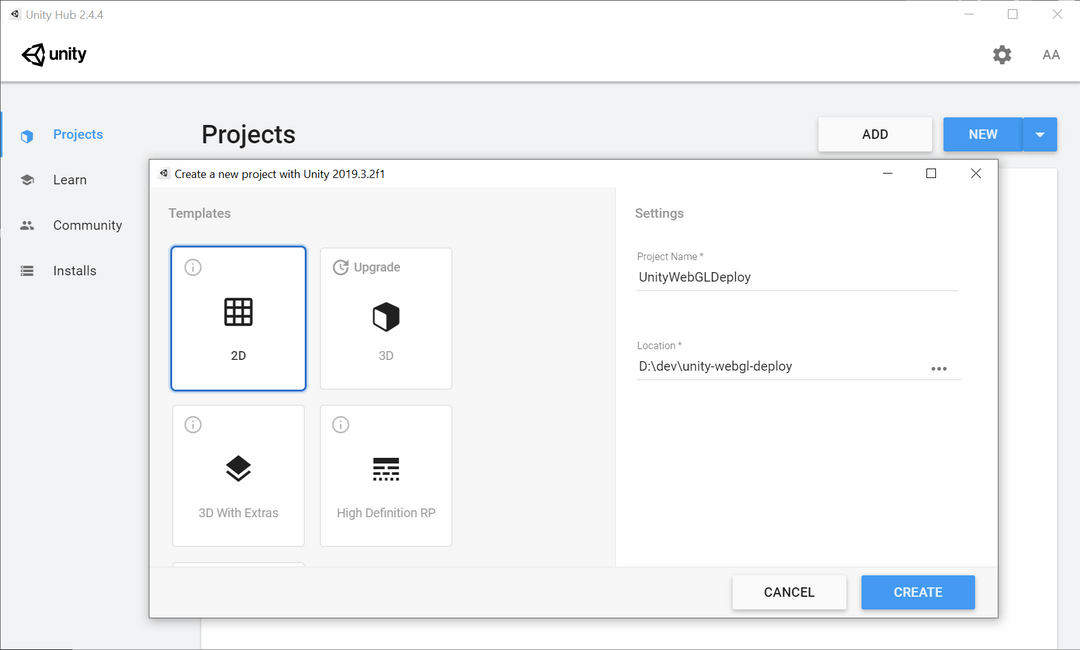
# Create Unity project
Open Unity Hub and create a new project. I'm using a 2D project template, but you can use any other.
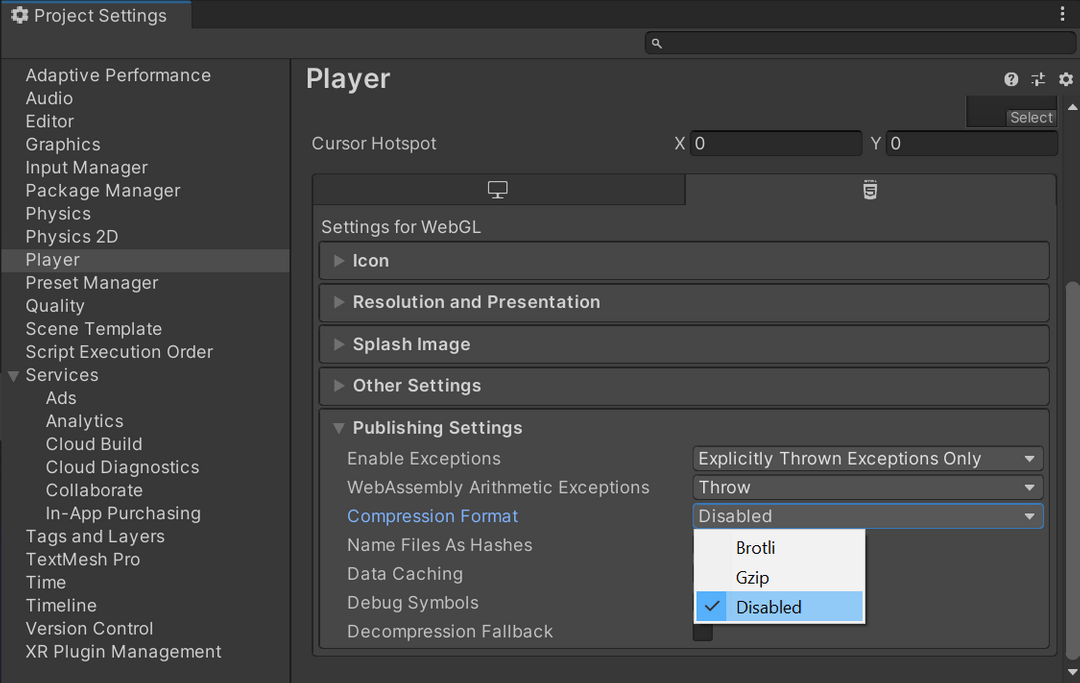
Next, open Edit -> Project Settings, select WebGL platform, open
Publishing Settings block and change Compression Format to Disabled. Any
other format will produce errors when published on GitHub Pages (see the
Troubleshooting section). Don't forget to press File -> Save Project;
using the default shortcut Ctrl+S won't save your changes!
Then, create a .gitignore file in the project folder (for me, it's
UnityWebGLDeploy/.gitignore):
[Ll]ibrary
[Tt]emp
[Bb]in
[Oo]bj
[Ll]ogs

.DS_Store

# Autogenerated VS/MD solution and project files
*.csproj
*.unityproj
*.sln
*.suo
*.tmp
*.user
*.userprefs
*.pidb
*.booproj
*.symbols.zip

# Exclude rider idea data
.idea

# Unity3D generated meta files
*.pidb.meta

# Unity3D Generated File On Crash Reports
sysinfo.txt
# Create Unity Activation GitHub Action
To explain the need for the next step, you need to acknowledge the following:
- Each Unity installation requires a valid license to run
- Licenses are bound to machines, so you need to activate a new license on each new machine
- GitHub Actions create a new virtual machine for each repository and maintain the same machine ID for all Action runs inside a repository
So, we need to acquire a Unity license just one time for our repository to
execute builds however many times we want. To do that, we will use GitHub
Actions provided by GameCI (opens new window). If you have any troubles up to the point of
downloading the unity license file (.ulf), follow their
documentation (opens new window).
Our first step will be creating a new workflow file
.github/workflows/activation.yml.
name: Acquire activation file
on:
  workflow_dispatch: {}
jobs:
  activation:
    name: Request manual activation file
    runs-on: ubuntu-latest
    steps:
      - name: Request manual activation file
        id: getManualLicenseFile
        uses: game-ci/unity-request-activation-file@v2
        with:
          unityVersion: 2020.3.9f1
      - name: Expose as artifact
        uses: actions/upload-artifact@v2
        with:
          name: ${{ steps.getManualLicenseFile.outputs.filePath }}
          path: ${{ steps.getManualLicenseFile.outputs.filePath }}
Replace unityVersion with the one you are using for your project.
This workflow generates a new license activation file (.alf) which we will use
to request a new license for our repository.
# Commit and push changes
Now, go back to GitHub Desktop, check in those ~30 files, and press the
Commit button.
On the following popup, don't choose any branch - go straight to
Publish branch.

# Activate Unity license for your repository
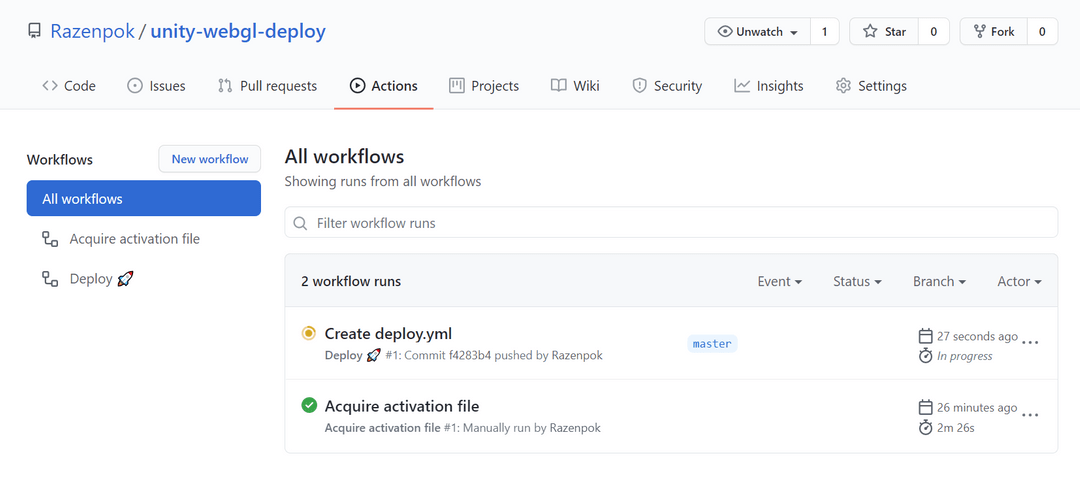
Open the Actions tab in your repository page, select Acquire activation file
workflow, and press Run workflow.

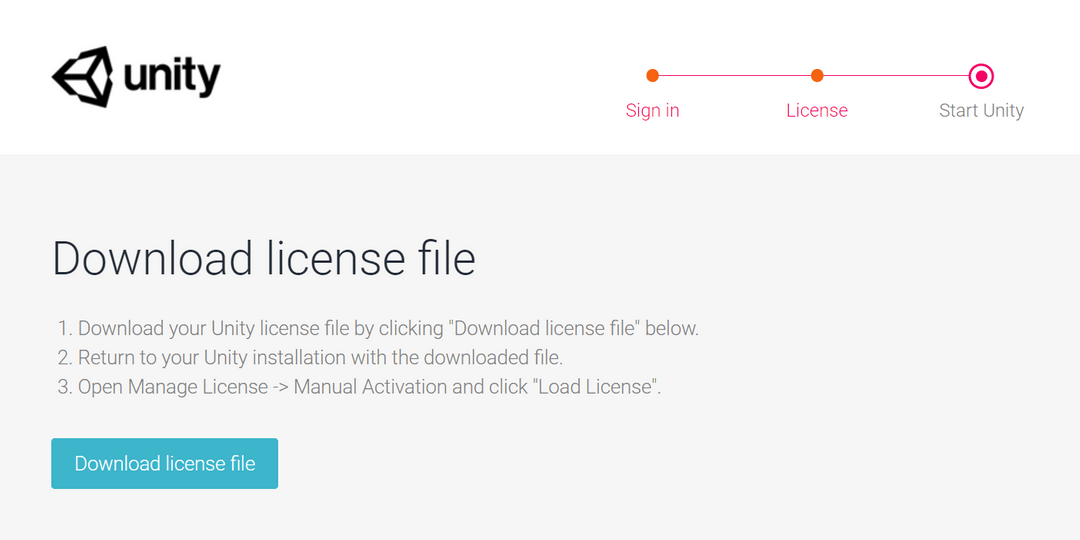
Wait until it's finished and download the .alf file. It is downloaded as a
.zip file, though - you need will need to unzip it and use the actual
.alf file from the inside in the next step.

Visit license.unity3d.com (opens new window) and upload it.
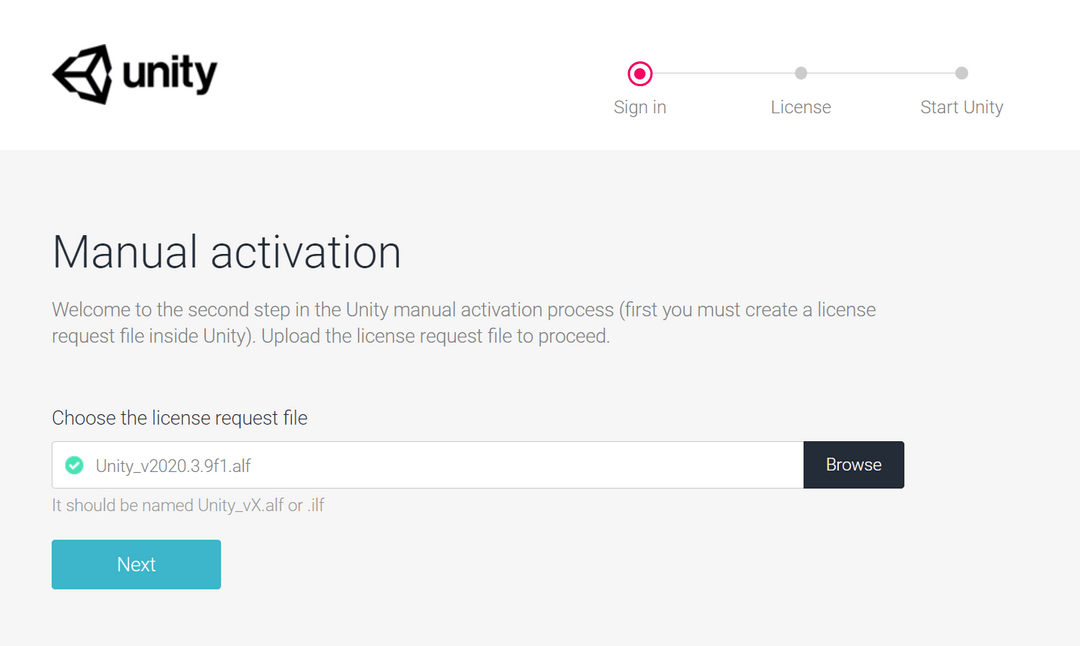
If you are not sure which license option to pick, go for Personal Edition.
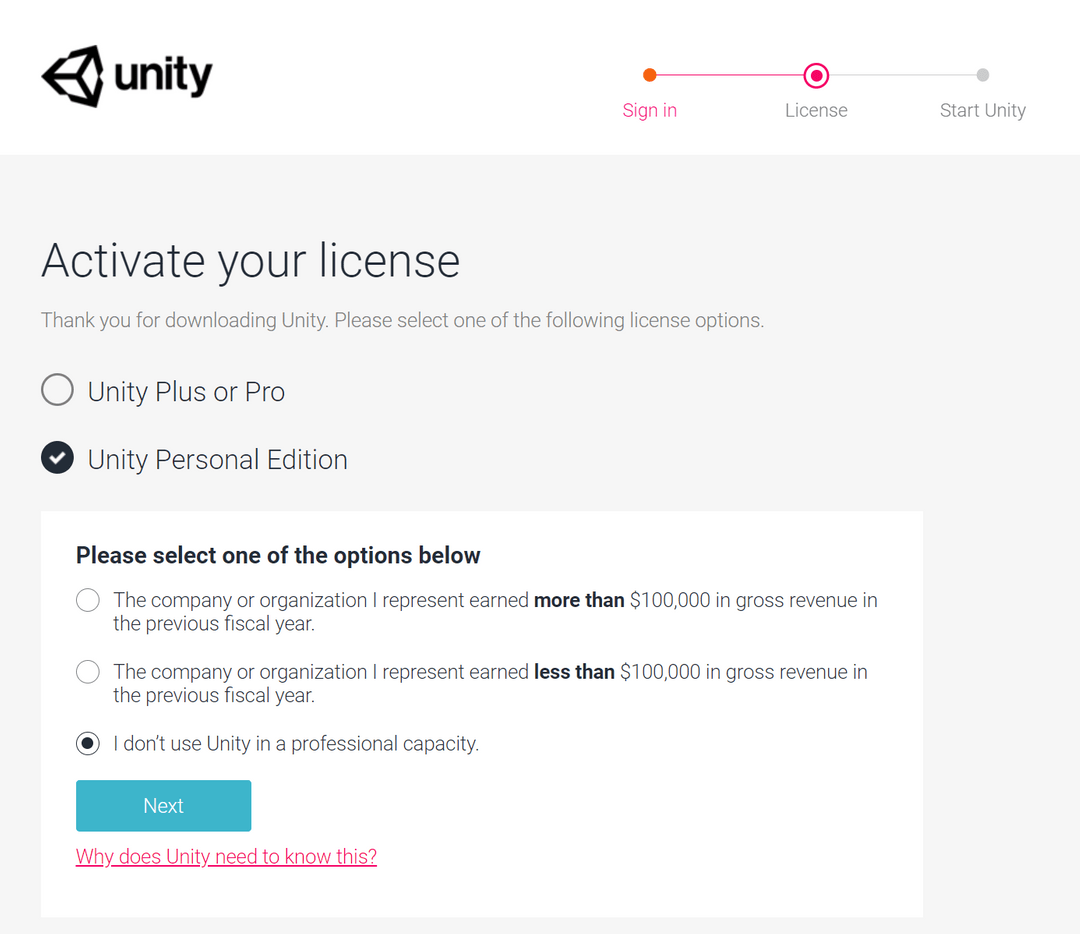
Next, hit the download button - it will download the unity license file (.ulf)
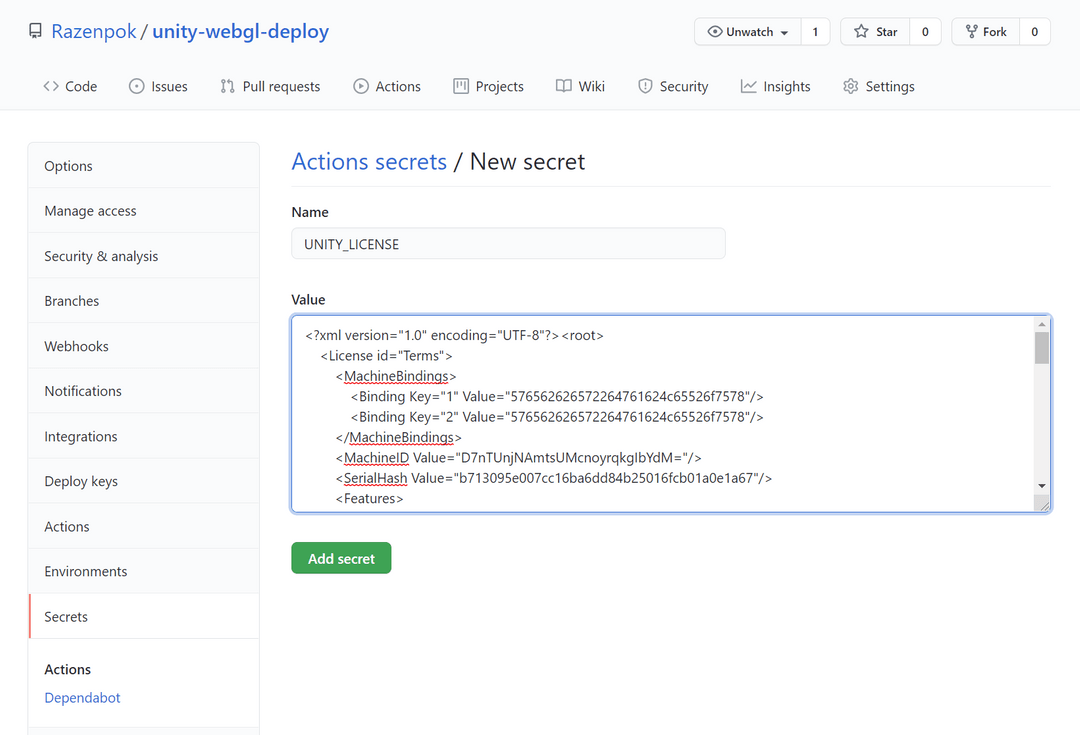
# Add the Unity license file to repository secrets
Go to the Secrets page of your repository Settings.
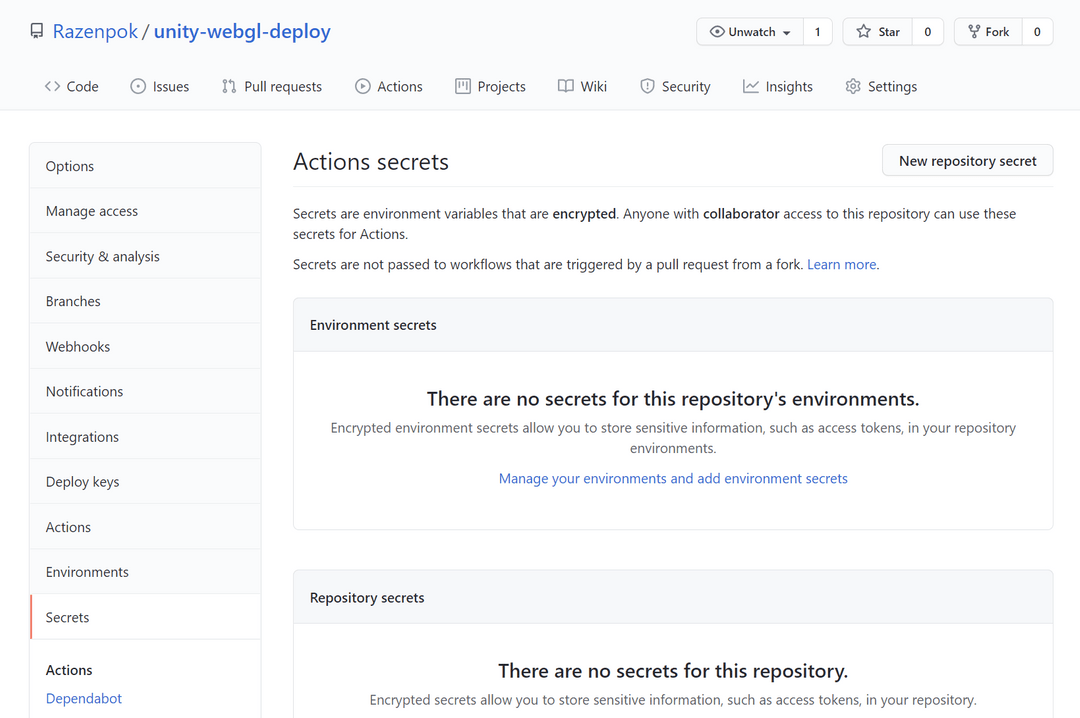
Create a new repository secret:
- Name:
UNITY_LICENSE - Value: contents of your
.ulffile
# Create Deploy GitHub Action
Now, as we've got a valid Unity license for our repository, it's time to set up an actual build pipeline for our project. Again, we will use GameCI (opens new window) for this purpose. If you get troubles in this section, follow the relevant part of their documentation (opens new window).
As with any GitHub Action, first we need to create a new workflow
.github/workflows/deploy.yml.
name: Deploy 🚀

on:
  pull_request:
    branches:
      - master
    types: [closed]
  push:
    branches:
      - master

jobs:
  build:
    name: Deploy 🚀
    runs-on: ubuntu-latest
    steps:
      - name: Checkout repository
        uses: actions/checkout@v2
        with:
          lfs: true

      - name: Cache Library
        uses: actions/cache@v2
        with:
          path: UnityWebGLDeploy/Library
          key: Library-${{ github.sha }}
          restore-keys: Library-

      - name: Build project
        uses: game-ci/unity-builder@v2
        env:
          UNITY_LICENSE: ${{ secrets.UNITY_LICENSE }}
        with:
          projectPath: UnityWebGLDeploy
          unityVersion: 2020.3.9f1
          targetPlatform: WebGL

      - name: Deploy to GitHub Pages
        uses: JamesIves/github-pages-deploy-[email protected]
        with:
          branch: gh-pages
          folder: build/WebGL/WebGL
          commit-message: Deploy
          single-commit: true
You will need to customize this file for your project:
- Replace
masterwithmainif your default branch is different - Replace
unityVersionwith the one you are using for your project - Replace
UnityWebGLDeploywith the name of your Unity project
This workflow builds your project and deploys it to the gh-pages git branch,
which we will use in the next step.
Now, open GitHub Desktop, commit and push as we did earlier.
# Set up GitHub Pages
Go to Actions and wait for the deployment to finish. The initial deployment
might take 15-20 minutes, but subsequent builds will be faster - somewhere
around 5-10 minutes.
After deployment, go to Pages in your Settings and select gh-pages branch
as a source for GitHub Pages.

# Game published
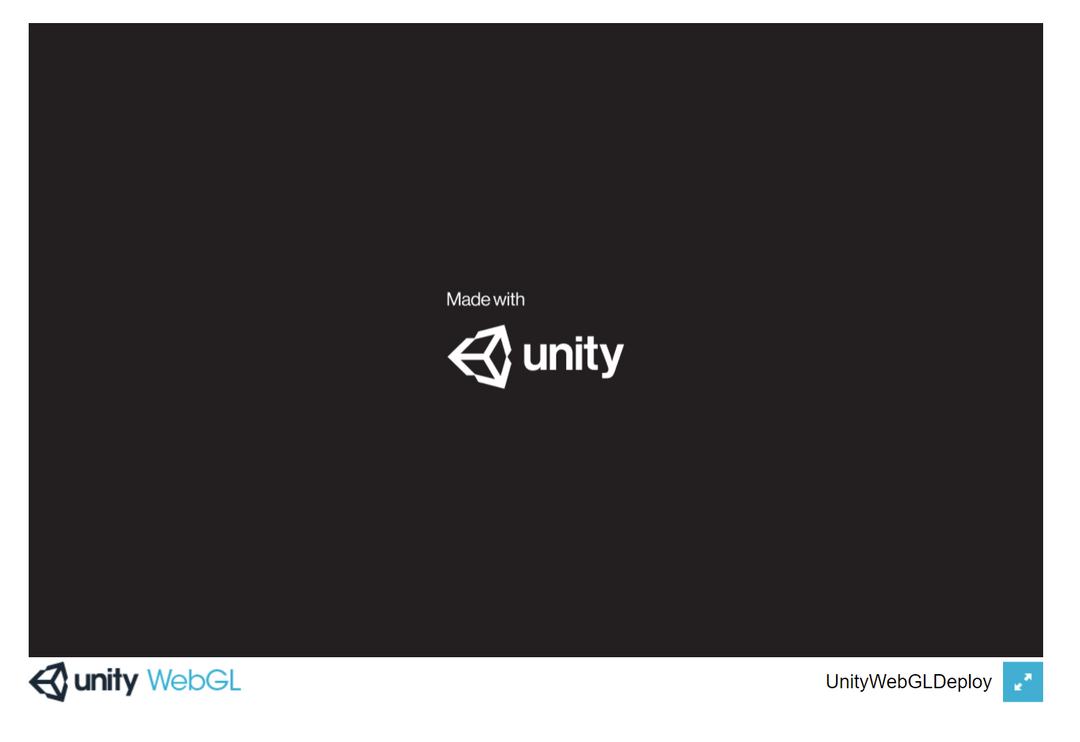
That's it! Your game should now be published at
PROFILE_NAME.github.io/REPOSITORY_NAME, like
razenpok.github.io/unity-webgl-deploy (opens new window).
You might notice that the actual address is
refactoring.ninja/unity-webgl-deploy (opens new window) - that's because I'm using a custom
domain for my razenpok.github.io pages. Let me know in the comments if you are
interested in a tutorial for setting up one for yourself 😃.
# Troubleshooting
# I see the "404 File not found" page instead of the deployed game
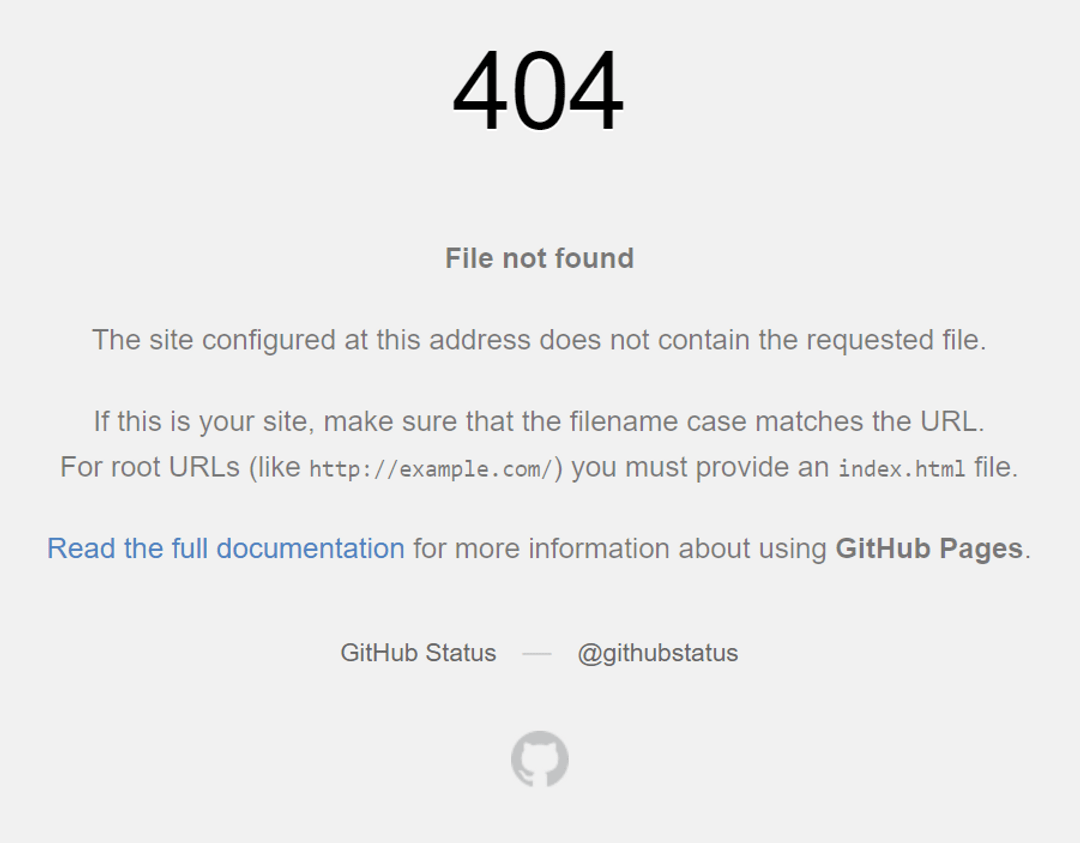
This error means that GitHub Pages couldn't find appropriate files to host. Most
likely, the reason is that the Pages deployment wasn't completed yet. To check
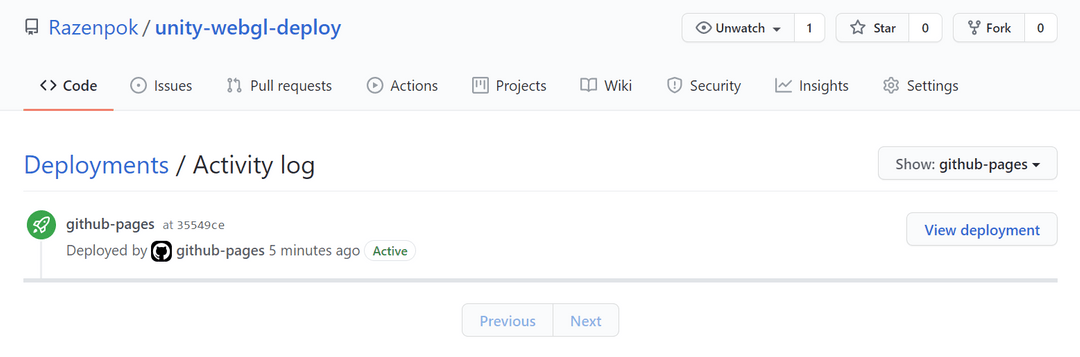
that, go to the repository page and click Environments.

In this tab, wait for the deployment to finish and then press View Deployment.
# Game is published, but it is stuck at loading
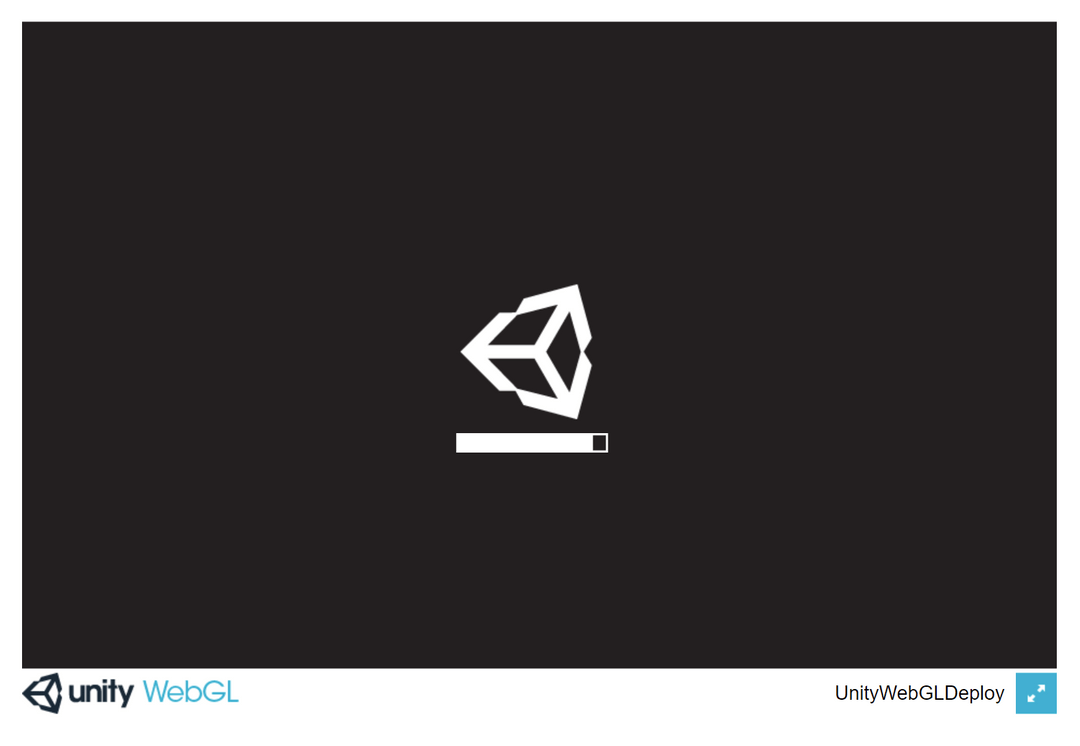
Open your browser console (on Google Chrome, you need to press F12). If you see
something like this, then you've probably didn't change the Compression Format
to Disabled OR you didn't press File -> Save Project after that, so it
wasn't saved.
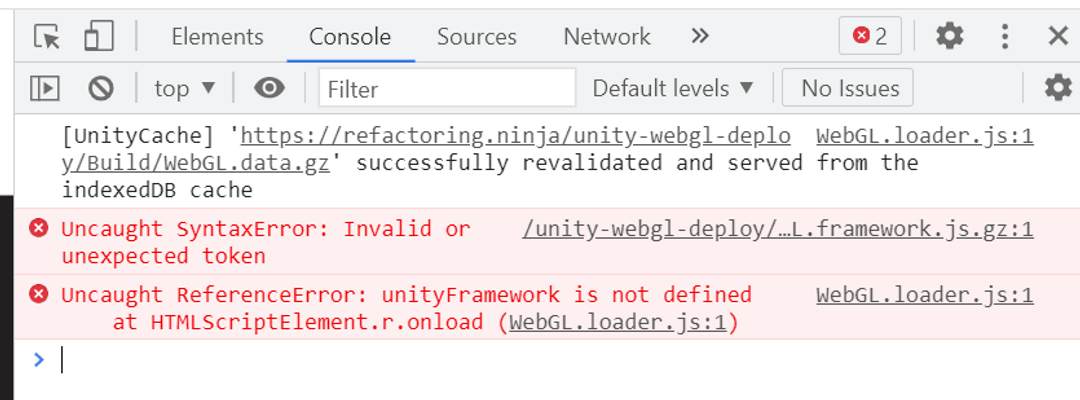
Go ahead and do it properly this time, then commit and push changes. After a re-deployment, it should be loading correctly.
# What's next?
Develop your game! Each new commit in the master (or main) branch will
re-deploy your game. Additionally, I would recommend the following improvements:
- Configure Git LFS (opens new window). Binary assets, like texture or sounds, tend to weigh a lot, and the proper way to store them in a repository is to use LFS. I would highly suggest doing it in the early stages of development to prevent issues down the road.
- Create a custom WebGL template (opens new window). Unity uses the default WebGL template for new projects, so you might want to create a new one for your game to make it stand out from the crowd.
- Create a Free GitHub organization (opens new window). With organizations, you can simplify
your game link from
PROFILE_NAME.github.io/REPOSITORY_NAMEtoORG_NAME.github.io. For example, changingrazenpok.github.io/super-gametosuper-game.github.io. To do that, create a new organization and create aORG_NAME.github.iorepository in it. For example, you will need to create asuper-game.github.iorepository in asuper-gameorganization. For additional information, follow the documentation (opens new window).
# Summary
In this tutorial we've created and published a Unity (opens new window) game to GitHub Pages (opens new window) using GitHub Actions (opens new window) provided by GameCI (opens new window). You can use this knowledge to bootstrap the development of any game - from your normal projects to quick-built prototypes and game jam projects. It will save you those precious development hours when you most need them 😃
If this tutorial was any help to you, please hit the reaction button below - it means a lot. Feel free to also leave me a comment with any feedback or questions.
Thanks for reading!